Convert to a Multi-page Form
If you need more space, or would like to add navigation options, or
simply want to enhance your form design, then consider converting it to
a multi-page format. It's a simple, two-step process.
Converting from single-page to multi-page format
First, you must convert the form type to multi-page. In the Form
Designer Toolbar, click Settings
> Convert to a Multi-page Form, and then confirm
your choice in the dialog box that follows. Using this option will convert
your single-page form to a multi-page form. All of your form elements
will be added to page 1 of the new multi-page form. At that point you
can add pages to your form and move your fields around.
 It will take a few
moments for the system to prepare your form for multi-page use. When the
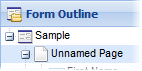
conversion is complete, you'll see all of the elements in a new arrangement
beneath a new page element (seen directly beneath the root form node
as "Unnamed Page").
It will take a few
moments for the system to prepare your form for multi-page use. When the
conversion is complete, you'll see all of the elements in a new arrangement
beneath a new page element (seen directly beneath the root form node
as "Unnamed Page").
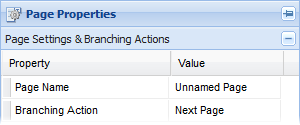 To change the name of the first
page, click on the "Unnamed Page" item in the list, then find
the Page Name property in the
Page Properties panel, and edit
the Value (e.g., "Page 1").
To change the name of the first
page, click on the "Unnamed Page" item in the list, then find
the Page Name property in the
Page Properties panel, and edit
the Value (e.g., "Page 1").
Adding a second page
The second step is to add
one or more pages to your form. You can then move
and add elements to that page,
setup the page-branching
logic, and change general navigation
settings. Learn more in Introduction
to Multi-page forms.
Note: As you setup
a new form in the Form
Wizard, you are given the option of choosing a single-page or
multi-page format.
See Also
The Form Designer
Form Outline Panel
Form Workspace
Form Designer Toolbar
Previewing Forms
Dealing with Errors
Saving Changes
Using the Undo Feature
Inserting Form Elements
Moving Form Elements
Deleting Form Elements
Using the Property
Panel
Element Properties Panel
Editing Element Properties
Inline Caption Editing
Applying Settings
to Multiple Elements
Rebuild & Clear Cache
Convert to a Multi-page Form
Duplicating Forms
Deleting Forms